
These OT service log FAQs include questions on how to select students, create service logs, and complete the required service log fields. If you still need help, please contact the DOE help desk.
Contents
- How do I create a service log?
- I can’t find my student. What should I do?
- My student list is too long to scroll. How do I filter my list?
- After selecting multiple students, I want to remove one. What should I do?
- After selecting multiple students, I want to add one. What should I do?
- Why can’t I select the service log for the next student in the tab row?
- Why is my Provider Name/Credentials field blank?
- Why can’t I change my Provider Name/Credentials in the service log?
- What if the student or provider did not attend the session?
- Do I need to calculate the Service Length?
- Do I need to fill out the Location Details field?
- Do I need to complete the Classroom Number field?
- Do I need to complete the Provider Location field?
- How do I complete the Documentation of Service and Student Performance section?
- What if the procedure I provided is not on the Procedure Description list?
- How do I add another procedure?
- How do I delete procedures?
- Why can’t I edit the Total Reimbursable Minutes?
- How do I complete the Objective Note section?
- How do I complete the Assessment of Performance/Progress section?
- How do I complete Proposed Plan and Target for Upcoming Services?
- What are Session Notes?
- What is Provider Signature?
- What is Save & Clone?
- What is Save & Next Student?
- Why can’t I select the Submit button?
- Can I include attachments to a service log?
How do I create a service log?
Go to Create a service log in the OT service logs navigation guide for instructions.
I can’t find my student. What should I do?
In the Select Student window, turn on the toggle next to All Services.
By default, the list displays only current services. All Services includes services where the current date is after the service projected end date, but within 365 days of today’s date. Note that you can’t submit service logs for services provided more than one year before today’s date. If you’re still unable to find your student or service, please contact the student’s school administration to add you to the student’s service or team.
My student list is too long to scroll. How do I filter my list?
In the Select Student window, use Find Student or Filter School to filter your list. Use the Sort options to list students in order by name, school, or last service date.
After selecting multiple students, I want to remove one. What should I do?
If you selected more than one student, you must complete the current student service log before navigating to the next. To remove a student from the Add Service Log window, select the X on the current student tab, or select Cancel at the end of the form.
After selecting multiple students, I want to add one. What should I do?
You cannot add additional students from the Add Service Log window. Complete and submit logs for the selected students, then go back to Create Service Log to create service logs for additional students.
Why can’t I select the service log for the next student in the tab row?
When creating service logs for multiple students, you must complete the current student service log before navigating to the next. You can either submit or cancel the current service log to advance to the next student tab.
Why is my Provider Name/Credentials field blank?
This field is blank when your provider credentials are not entered into your eCSSS User Profile. Please contact the DOE help desk to update your eCSSS User Profile.
Why can’t I change my Provider Name/Credentials in the service log?
Provider Name/Credentials is a read-only field that displays credentials from your eCSSS User Profile. Please contact the DOE help desk to update your eCSSS User Profile.
What if the student or provider did not attend the session?
Select Student or Provider from the Student/Provider Not Available list. If the Student is not available, you must also complete the Reason Student Not Available. If the Provider is not available, select a Service Alternative, then complete either the Parent Informed or Alternate Description field.
Do I need to calculate the Service Length?
Service Length is automatically calculated when you enter a Start Time and End Time. Alternatively, you can enter a Start Time and Service Length to automatically calculate the End Time.
Do I need to fill out the Location Details field?
The Location Details field is optional if you want to document additional information about the service location.
Do I need to complete the Classroom Number field?
The Classroom Number field is displayed only when Delivery Mode is In-person. Entry in this field is optional.
Do I need to complete the Provider Location field?
The Provider Location field is displayed only when Delivery Mode is Telepractice. Entry in this field is required.
How do I complete the Documentation of Service and Student Performance section?
Select Relevant Student Behavior and check all applicable behaviors. If a behavior is not on the list, select Other and provide a brief description in the Relevant Student Behavior Details field.
Enter the number of Minutes and select a Procedure Description. Select + Add Procedure and scroll down to enter another procedure. Select the Trash icon to delete a procedure.
Note that the Total Reimbursable Minutes must be equal to the Service Length minutes.
What if the procedure I provided is not on the Procedure Description list?
If you provided a procedure that is not in the Procedure Description list, type a brief description, and the field will automatically categorize the procedure as “Other.”
- “Other” procedures are not considered Medicaid reimbursable and do not count toward the Total Reimbursable Minutes.
How do I add another procedure?
Select + Add Procedure and scroll down to enter another procedure.
How do I delete procedures?
Select the Trash icon to delete a procedure.
Why can’t I edit the Total Reimbursable Minutes?
Total Reimbursable Minutes is automatically calculated and read-only. This field displays the sum of minutes for Medicaid-reimbursable procedures.
- When the Service Delivered is Consultation, Observation, or Parent Training, procedure minutes are not included in the Total Reimbursable Minutes. These delivery methods are not Medicaid Reimbursable.
- For all other Service Delivered types, the Total Reimbursable Minutes is the sum of all procedure minutes, excluding procedures categorized as Other.
- The Total Reimbursable Minutes cannot exceed the Service Length minutes.
- Note: For records created in earlier versions of the app, the Total Reimbursable Minutes was equal to Service Length minutes when Level of Need is Skills, and zero when Level of Need is Maintenance. The Level of Need field is no longer displayed in the app.
How do I complete the Objective Note section?
Select an Objective, then select one or more Implementations from the checkbox list. If an objective or implementation is not on the list, select Other Objective or Other Implementation and enter a brief description in Other Objective Description or Other Implementation Description.
Select +New Objective to add up to three Objective/Implementations sections. Select the Trash button to delete a section. Note that at least one Objective and Implementations set is required to save a record. Add any additional information in Objective Details.
How do I complete the Assessment of Performance/Progress section?
Enter a brief description of the Task. Then, complete the Measurable Data, Level of Assistance, and Type of Assistance sections.
Select the New Task button to document up to three Tasks. Select the Trash icon to delete a section. At least one Task is required to save a record.
- Measurable Data: Select Open to view and document measures related to this task.
- Completed task __ out of __ times
- Enter the number of times the task was completed and the total number of attempts at this task.
- Completed task in ___ minutes
- Enter the number of minutes it took the student to complete this task.
- Completed task with ___ % accuracy
- Enter the student’s accuracy rate for this task.
- Completed task __ out of __ times
- Level of Assistance: Select Open to view and document levels of assistance related to this task.
- Required assistance __ out of __ times
- Enter the number of times the student needed assistance and the total number of attempts at this task.
- Required assistance for ___ minutes
- Enter the number of minutes the student required assistance for this task.
- Required assistance ___ % of the time
- Enter the rate of time the student required assistance for this task
- None
- Select None if the student didn’t require any assistance with this task.
- Required assistance __ out of __ times
- Type of Assistance: Select Open to view and select all types of assistance applicable to this task.
- Peer
- Adult
- Reminders
- Other (enter a brief description)
Document any additional information in Performance/Progress Notes.
How do I complete Proposed Plan and Target for Upcoming Services?
Enter a brief description of the student’s Next Session Focus(es) and/or Next Session Goal(s). At least one of these fields is required to save the record
What are Session Notes?
Session Notes is an optional field to document any other pertinent information about the student’s visit.
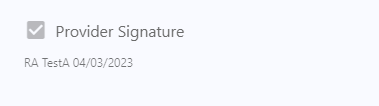
What is Provider Signature?
Select the Provider Signature checkbox, and your username and today’s date appear as your digital signature. Provider Signature is required to save your session log.
What is Save & Clone?
Select Save & Clone, then Submit to save the current service log and create a copy. The copy simplifies data entry for a similar service log for the student. Note that the Service Date is cleared in the cloned record and must be manually entered. You can modify the copied service log before submitting. The Save & Clone option is not available when creating service logs for multiple students.
What is Save & Next Student?
If you are creating service logs for multiple students, select Save & Next Student, then Submit to save and submit the current student service log and open the service log for the next student.
Why can’t I select the Submit button?
The Submit button is disabled by default. Select one of the available save options to enable the Submit button.
Can I include attachments to a service log?
No, providers can’t include attachment to service logs.
Have more questions?
If you have additional questions, please contact the DOE help desk.